
 |
| Pottery Barn Kids |
If you like to dabble in crafts like I do, this is so much fun! This would be a great kids activity or even great for Family Home Evening. PB Kids has an adorable bird garland for $29.50. (I L.O.V.E birds, remember?) Yikes! That is a little steep for me considering I am only getting 5 birds, and let's not forget shipping and tax.
Garlands, especially this one, are great for many occasions. Think of baby showers, weddings, parties, crib decorations (as long as the little one can't play with it), outdoor decor, Christmas, and the list goes on.
My garland costs maybe $2 - $3 max. Although I do not use fabric like PB does, my garland is simple, easy, cheap, and uses supplies most of us already have around the house. Who doesn't love that??
Supplies
Glue like Elmer's or whatever you got on hand
Card stock in various colors
String
Hole Punch
Scissors
Black Sharpie
Pencil
Bird Pattern Link
Bird Pattern Link
1. Print out my pattern, and cut it out.
2. Place pattern pieces onto paper. Keep in mind the direction you want your birds to face and what side of the paper you want to use. If you are using two-sided paper and want your wings to match or not, it will depend on how you place your pattern onto your paper.
3. Trace the patterns using a pencil onto your card stock, and cut it out. Trace and cut out two wings. You will need to flip the wing the other way if you are using two sided paper, or you could have two different colored wings. It's your garland, do you what you want.


4. If you need to use the dotted line on the wing as a reference, place the pattern piece below the wing for a guide. Refer to photo. Fold at the dotted line.


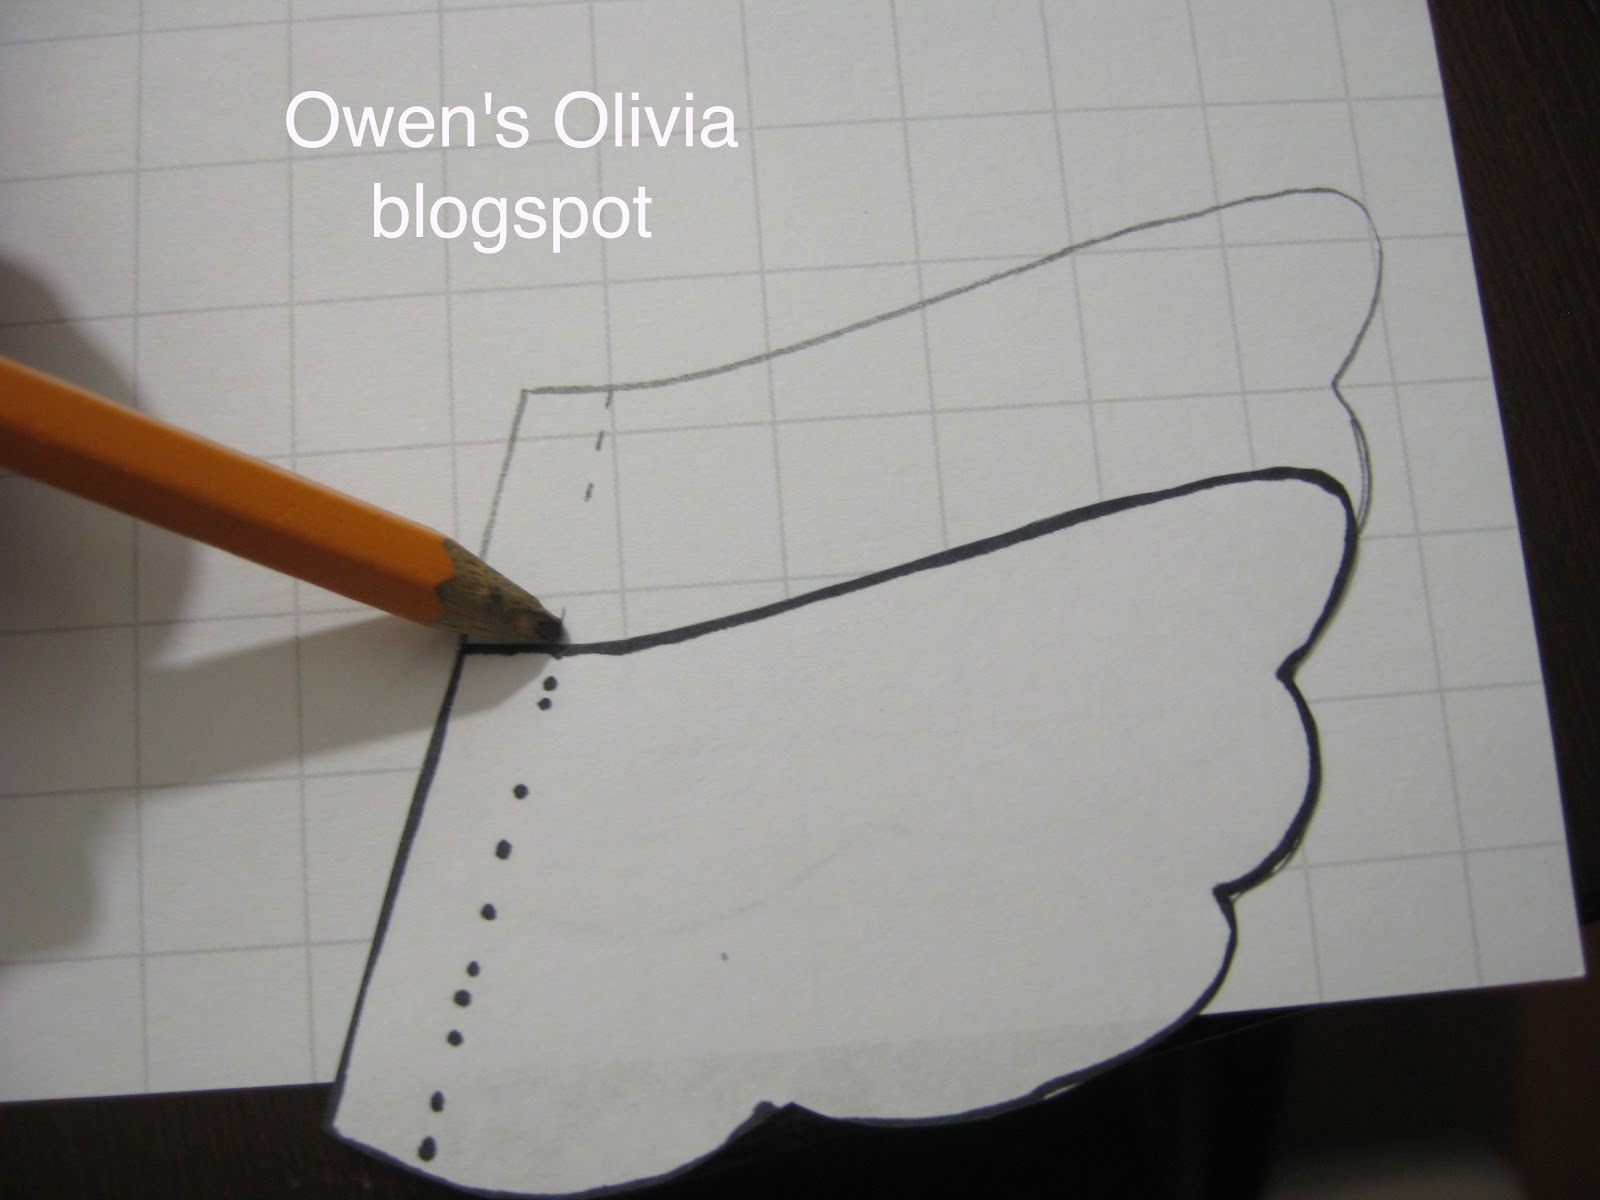

5. Place the folded wing onto the PATTERN bird where there is a solid line on its side. Look at where the wing tips touch, and use this as a reference point.
6. Place glue on the folded part of the wing.


7. Take the folded wing and glue it to your card stock bird. Try to eye ball it. Use your reference points. Don't stress or worry about if you are off a little. That guide is just for the crafty handicapped people. Smiles to you folks. :)

8. Repeat the wing for the other side, if you are using two wings.

8. Repeat the wing for the other side, if you are using two wings.
9. Using a pencil first, make a circle for the eye. Fill it in with a sharpie.
10. Use a hole punch to make a hole above the wing.
11. Run string through the holes of your birds and hang.


(After taking this photo, I realized how crammed my entry table is and needs a little updating. I need to fix that pronto! I'll keep you posted.)
I think this pattern has lots of potential for fun extras, so get creative! Use gems for the eyes. Try using several different papers or use fabric like PB does. You could even make a fun card out of this. (Great for Stampin' Up peeps.)
you are crazy good! liz
ReplyDeleteThis is darling! I always look at PB stuff and think, I could MAKE that! Love what you've done!
ReplyDeleteI'd love for you to come link this up at my Tuesday Time Out Party - open all week! There's a $50 Amazon card up for grabs this week too!
Tuesday Time Out Linky Party
Smiles,
Melanie
Reasons To Skip The Housework {The Blog}
Tinker B Boutique {The Shop}